Looking for something to help decorate your home for autumn? Want to be creative and get the kids involved? This Felt Harvest Wreath is the perfect no-sew project!
SUPPLIES • Wreath Ring • Felt • Fabric Of Your Choice • Trim or Ribbon • Scissors • Fabric Glue
Step 1: Cut out your leaves using the template provided or create your own!
Step 2: For leaf shape #4 (see template), put a dab of glue on one end and pinch together until secure. This will give the leaf a more 3D effect.
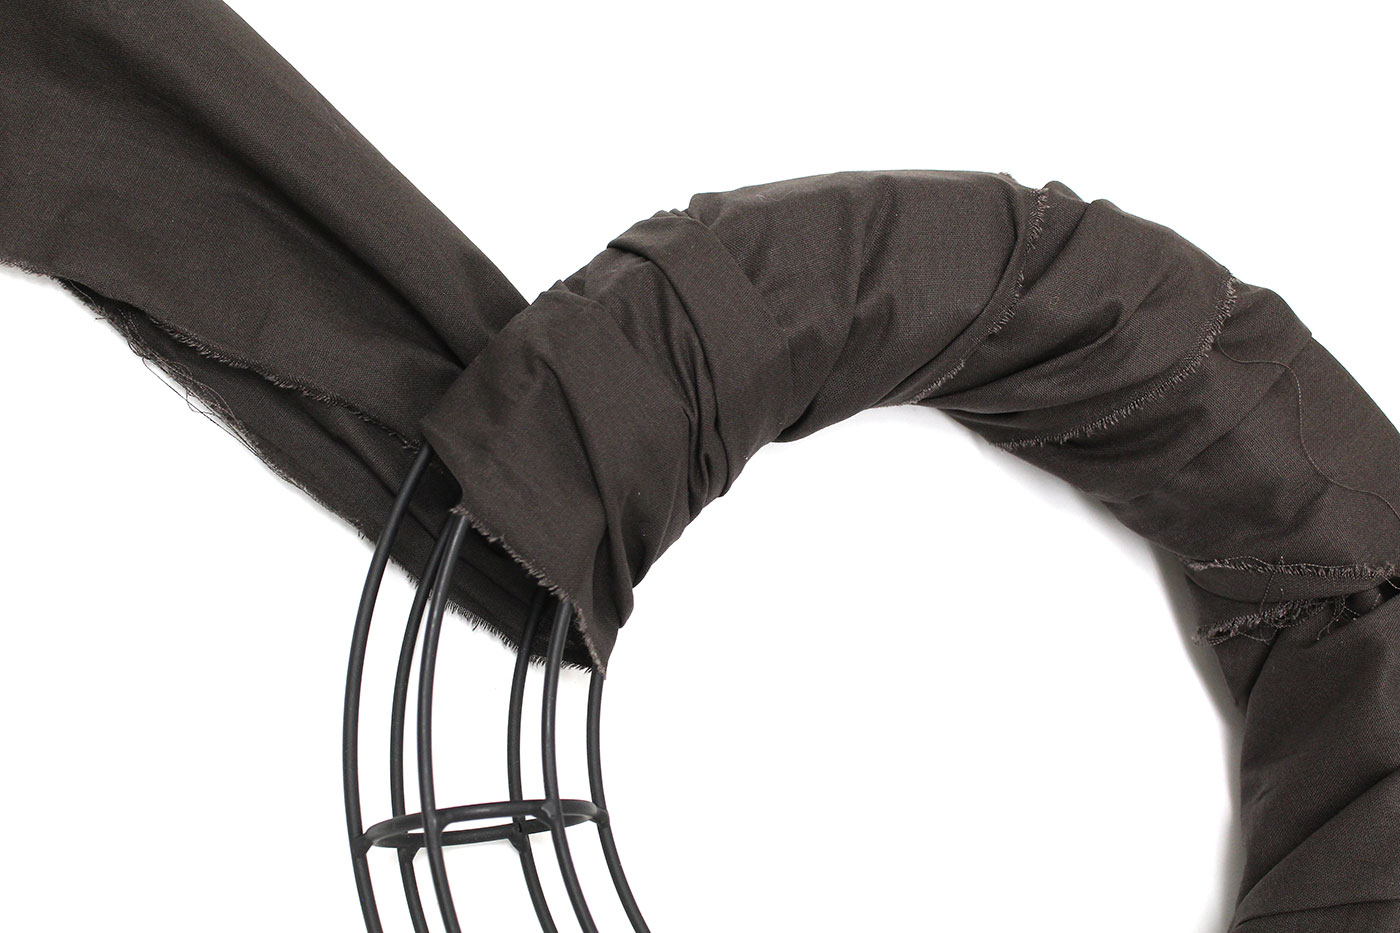
Step 3: Cut strips of fabric and wrap around your wreath frame. Secure with glue.
Step 4: Wrap decorative ribbon or trim over the fabric. Secure with glue.
Step 5: Layer leaves on top of the fabric and glue in place.
TIP: Use pins to map out placement of leaves before securing with glue.
Download project instructions and leaves template here.
If you’re a crocheter AND plant lover, this project is just for you! Create these cute plant holders for your mini succulent pots or other small plants. Hang them anywhere around your home or office and add some life into your living space!
Materials:
Super Bulky 6 or Jumbo 7 weight yarn 12mm crochet hook 1 stitch marker measuring tape scissors
Gauge:
6 sc x 7 rows = 4” (10 cm) * This is only a recommended gauge used to fit a mini 3″ x 2.5″ (7.5cm x 6.5cm) clay pot, using a 12mm crochet hook, as suggested. It is to be used as a reference. You may use the recommended hook size found on the label. Just note, gauge and size of project will vary depending on the yarn and hook size chosen.
Abbreviations:
CH = chain SC = single crochet SL ST = slip stitch ST(S) = stitch(es)
Round 1:
CH3, then close circle with a SL ST in the first CH. Make 1 SC in the middle of the circle, and then place a stitch marker on that ST. Make 5 more SC in the middle of the circle (Total of 6 STS)
Round 2:
Make 2 SC in the first ST. Place stitch marker on the first SC. Continue to make 2 SC in each ST. (Total of 12 STS)
Round 3:
*Make 1 SC in the first ST. Place stitch marker. Make 2 SC in the next; While keeping the stitch marker on the first ST, repeat from * to end of round. (Total of 18 STS)
Round 4:
*Make 1 SC in the first 2 STS. Place stitch marker on the first SC. Make 2 SC in the third ST; While keeping the stitch marker on the first ST, repeat from * to end of round. (Total of 24 STS)
Round 5-9:
Make 1 SC in each ST to end of round. Continue to place your stitch marker on the first SC of the round to keep track of each round. The edges will naturally begin to roll.
Round 10:
CH8, SL ST in the first ST, and continue to SL ST each ST to the end of round, including the CH. (Total of 32 STS)
Finishing:
Measure 8” (20cm) of your working yarn, cut. Wrap the tail end around the CH a few times. This will create the handle of your plant holder. Thread the tail end through all the wraps to keep it in place. Weave in all ends.
No-sew fabric baskets are fun to make, are great for organizing all the little things around your home … and would be a pretty Easter basket too!
Choose fabrics to match your home, the holiday or to create a splash of pretty colour.
What you’ll need:
1.8 m non stretch cotton cut or ripped into 15cm (6″) strips for your center fabric
1.2m craft cottons of your choosing cut or ripped into 4cm (1.5″) strips for your coiling fabric
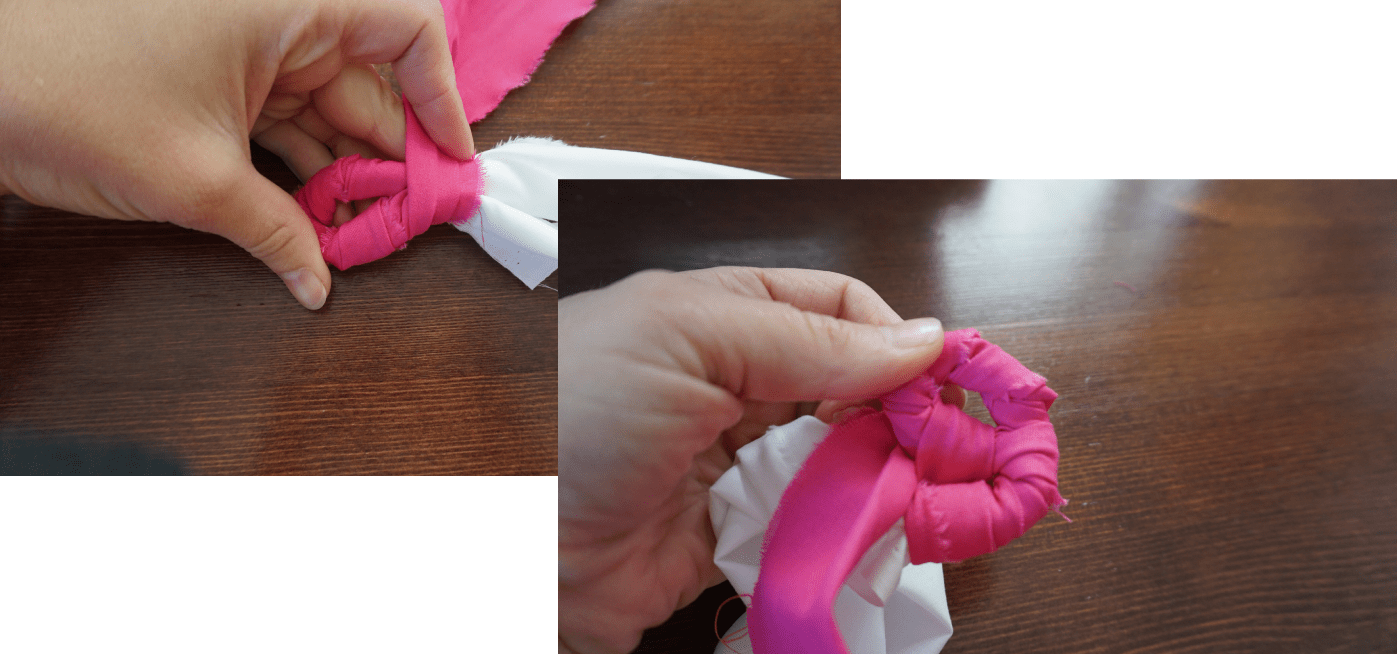
1. Bunch your center fabric together tightly at an end. Place an end of your first strip of coiling fabric right side out and at a right angle to your center fabric approximately 10cms (4″) from the bunched end and wrap around center fabric. Tightly wrap the coiling fabric around it’s own loose end and continue to wrap on an angle down your center fabric. Now you’re coiling!
2. Once you have approximately 15cms (6″) done, turn this coiled end toward itself and begin to coil around loose end of center fabric. After coiling 8cms (3″) coil one single time in the opposite direction you are wrapping through the hole you’ve created then continue to coil center fabric as you were doing previously. This is your first basket weave.
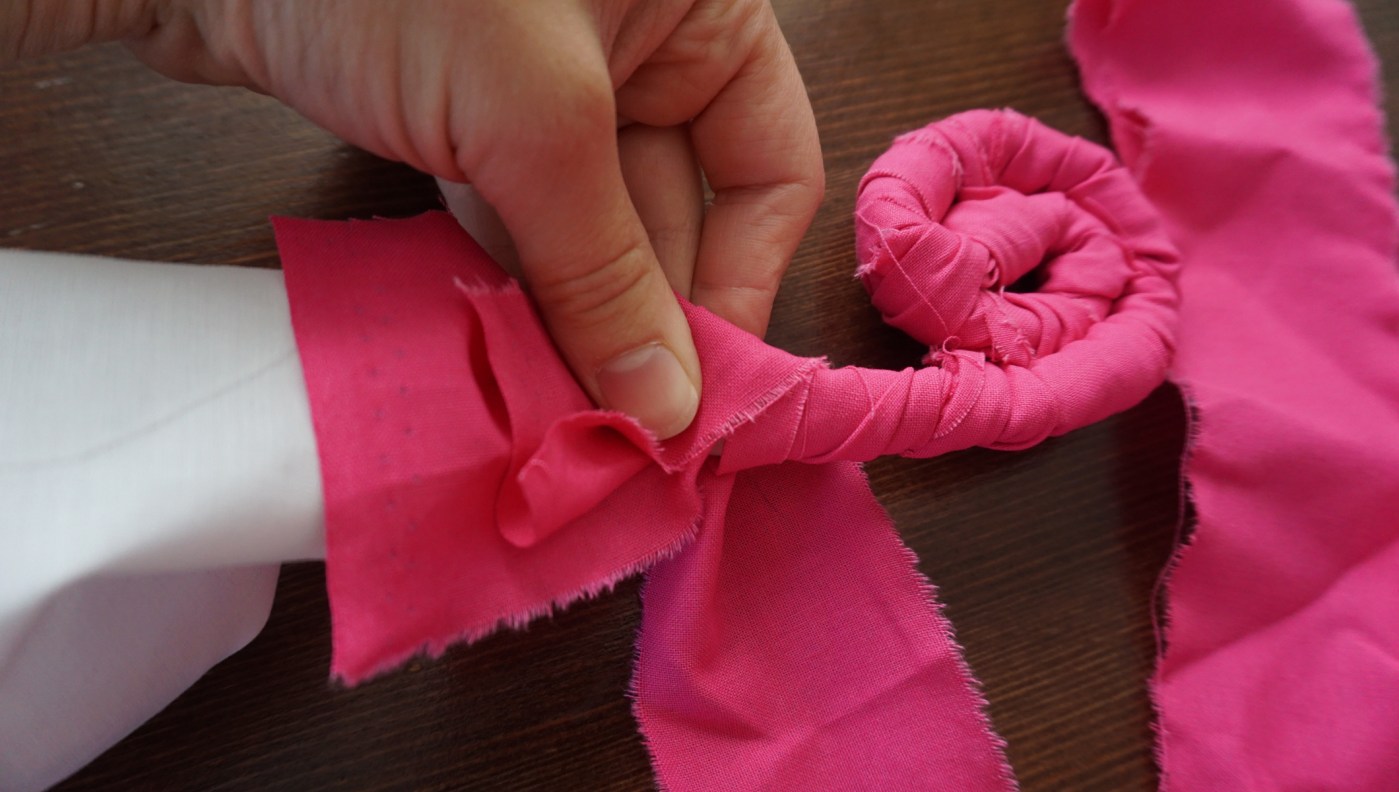
3. Continue to coil and weave through centre oval once every 8cms (3″) until it becomes a flat spiral shape. At this point you will be approaching the end of your first strip of coil fabric. To add another, simply lay the last bit of previous coiling fabric flat against center fabric and lay new coiling fabric flat in same position as previous. Coil around both pulling tightly to be sure they don’t come loose. Apply a similar technique when adding another center fabric strip: overlap the ends and coil extra tight.
4. Continue to follow this pattern of coiling and weaving until you’ve reached the desired circumference for the bottom of your basket. At any point you can now begin to hold your center fabric at a 45 degree angle as you weave to begin to build your sides. Continue on this angle until you’ve reached another point you’d like to change the shape again.
5. Coil and weave away! Continue on using strips and colour combinations in any pattern or order you like. Don’t worry about frayed ends, they add to the boho chic style of your finished product!
6. To finish your basket, cut end of last coiling fabric strip into two pieces and tie a double knot around last row of coil ensuring your center fabric in fully covered by the last wrap you’ve done. Now it’s ready to use!
Coatings of many different weights, types and styles are available for your next project. Choose from plaids, textured boucles or solids in a wide range of colour and so much more.
Let imaginations run wild with these cute felt Deer, Fox and Raccoon mask patterns.
Gather the materials you will need for this project.
Step 1:
Cut out all the shapes from the pattern. Pin your paper outlines to the appropriate colour felt and cut around.
Step 2:
Layer and glue the pieces of felt on top of one another. Using the picture reference as a guide.
Step 3:
To tie the mask, you will need to measure out approximately two 15” pieces of ribbon. Glue each piece (on the back side) near the edge of the mask, around where the middle of the eye cut outs are. Once all your glue has dried, try your new felt mask on! If the ribbon is too long after tying a bow, cut off any excess.
Download the printable PDF of patterns here. Download the printable PDF of instructions here.
Whether you’re off to the beach, the next soccer game or a picnic in the park, this Blanket Strap is a handy take-along for your blanket or towel. You could also use this as a stylish carry-all for your yoga mat! Make your own or as a gift and involve the kids in this simple project.
Canada Day is just around the corner and Fabricland has so many products that can be used for holiday decorating. Check out this simple, no-sew wreath project to show your Canadian pride!
Make a quick, last minute DIY greeting card for a holiday party host, a neighbour or that special someone. It’s a simple no-sew project that the kids can help with … perfect for your new favourite holiday fabric.
Pre-heat dry iron to silk setting. Cut your material and section of HeatnBond to match the size of your silhouette image.
Place HeatnBond Ultrahold paper side up on wrong side of material. Glide iron across paper side of HeatnBond Ultrahold lightly for 1-2 seconds. Allow material to cool. Trace the silhouette image onto the paper side of the HeatnBond Ultrahold and cutout.
Peel off paper backing. Adhesive should appear milky in colour. Note: shiny clear adhesive is a sign of overheating which will cause an insufficient bond, at which point you’ll need to reapply HeatnBond Ultrahold.
Place material right side up in desired position on card and iron for 4-6 seconds (Note: adjust ironing time for heavier materials/using several layers). Remove any adhesive from your warm iron easily with a dry cloth.
Once cooled, now it’s time to add flare to your card. Get creative with ribbon, trim, sequins or fabric embellishments!
Keep your furry friends warm and comfortable with this easy no-sew project. A great place to have treats and take naps…
What you need: · fleece · quilt batting · grid ruler · rotary cutter
What you do: You’ll need to determine the best size for your dog bed (see chart below). 1. Cut 2 rectangles of fleece adding 6″ (15cm) all the way around.
2. With both pieces together, cut 1″ (2.5cm) strips, 3″ (7.5cm) long around all edges.
3. Cut quilt batting to the size of the center (minus the 6″ (15cm) added). Center on top of the wrong side of one layer of fleece.
4. Add the 2nd layer of fleece on top of the batting and double knot 1 strip from the top to the corresponding strip on the bottom along all edges.
All Done!
Optional: Hand tack at regular intervals to secure all layers together.