Keep your mane under control while looking cool this summer with these colourful headbands.
Hand Dyed Batik fabrics were used for this project.
Item #0643018000D

What you need:
1m cotton fabric
15cm (6″) of 2cm (3/4″) elastic
Scissors, pins, thread, safety pin, chalk pencil and a measuring tape

What you do:
- First, measure your head where you would like the headband to sit. See left image below.
- Next, measure from the bottom of one ear to the bottom of the other as shown on the right.

Example measurements: Head = 56cm (22″) Ear to Ear = 33cm (13″)
- For the top strip, add an extra 10cm (4″) to the ear to ear measurement.
- Cut two strips 13cm (5″) wide (adjust this measurement if you’d like a thicker or thinner style) by the final ear to ear measurement (example size: 13cm x 23cm)
- For the back elastic, add 5cm (2″) to the elastic length to allow for the fabric to gather, and cut one strip 20cm (8″) long x 5cm (2″) wide.
- Fold each of your strips (the 2 large main ones and the one small elastic covering one) in half, lengthwise, with right sides touching. Pin all the way across, forming a tube for each

- Fold each strip in half lengthwise, with right sides together and press.
- To shape the main strip to the size needed to attach back band, taper the edges to the size of the back band strip and curve to center along edges as shown.


- Use the newly cut tapered piece as a pattern guide for the second piece. Trace and cut.

- Now you should have two main tapered strips of fabric, and one back band strip for the elastic.

- Using matching thread, sew across the pinned tops making sure to back-stitch.

- Using a safety pin, pencil, and your fingers, turn each section inside out and iron.
- Iron the main sections with the seams in the middle, as shown.

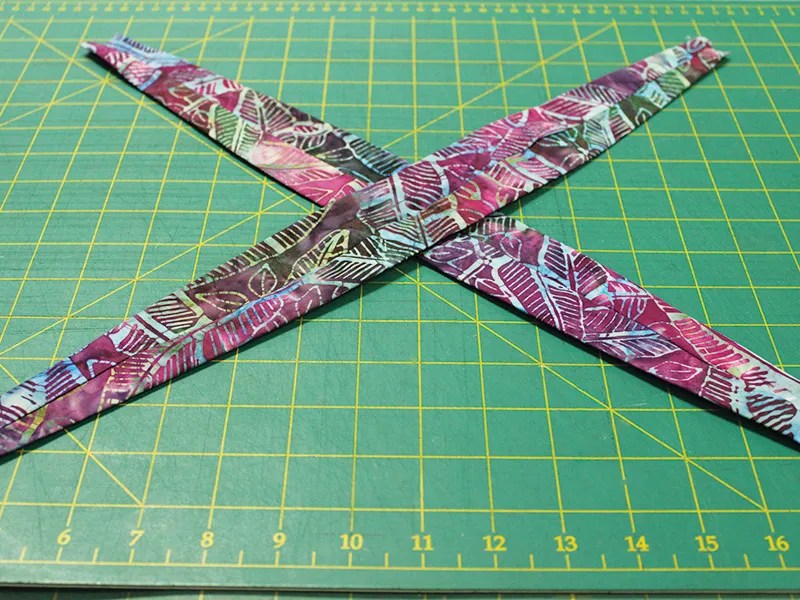
- Make an “X” with the two large tubes, seam sides facing up.
- Fold the bottom right section across and over to the top left.

- Then fold bottom left section across and over to the top right making sure that center overlapped portion lies flat.
- Match the 2 left and 2 right ends together to create top headband.

- Sew elastic securely to one end of the top headband.

- Attach a safety pin to the free end of the elastic. Slide the back band strip over the elastic and gather it onto elastic covering the end attached to top headband.


- Fold raw edges of back band covering joined area and either hand or machine stitch in place.
- Repeat for 2nd side.


