Your home could use more carrots this Easter! This cute Carrot Bouquet DIY is easy to create and will add the perfect pop to your seasonal home decor.

Your home could use more carrots this Easter! This cute Carrot Bouquet DIY is easy to create and will add the perfect pop to your seasonal home decor.

What better way to accessorize for Easter than with your own set of bunny ears! This Flexible Bunny Ears DIY, available in both adult & kid styles, is a fun make to create & wear.

With a new year comes the joy of being able to celebrate all the special holidays with family, friends & loved ones. We’re celebrating the joy of new craft cotton prints available for all your Valentine’s Day, St. Patrick’s Day & Easter project plans!

No-sew fabric baskets are fun to make, are great for organizing all the little things around your home … and would be a pretty Easter basket too!
Choose fabrics to match your home, the holiday or to create a splash of pretty colour.

What you’ll need:
1.8 m non stretch cotton cut or ripped into 15cm (6″) strips for your center fabric
1.2m craft cottons of your choosing cut or ripped into 4cm (1.5″) strips for your coiling fabric
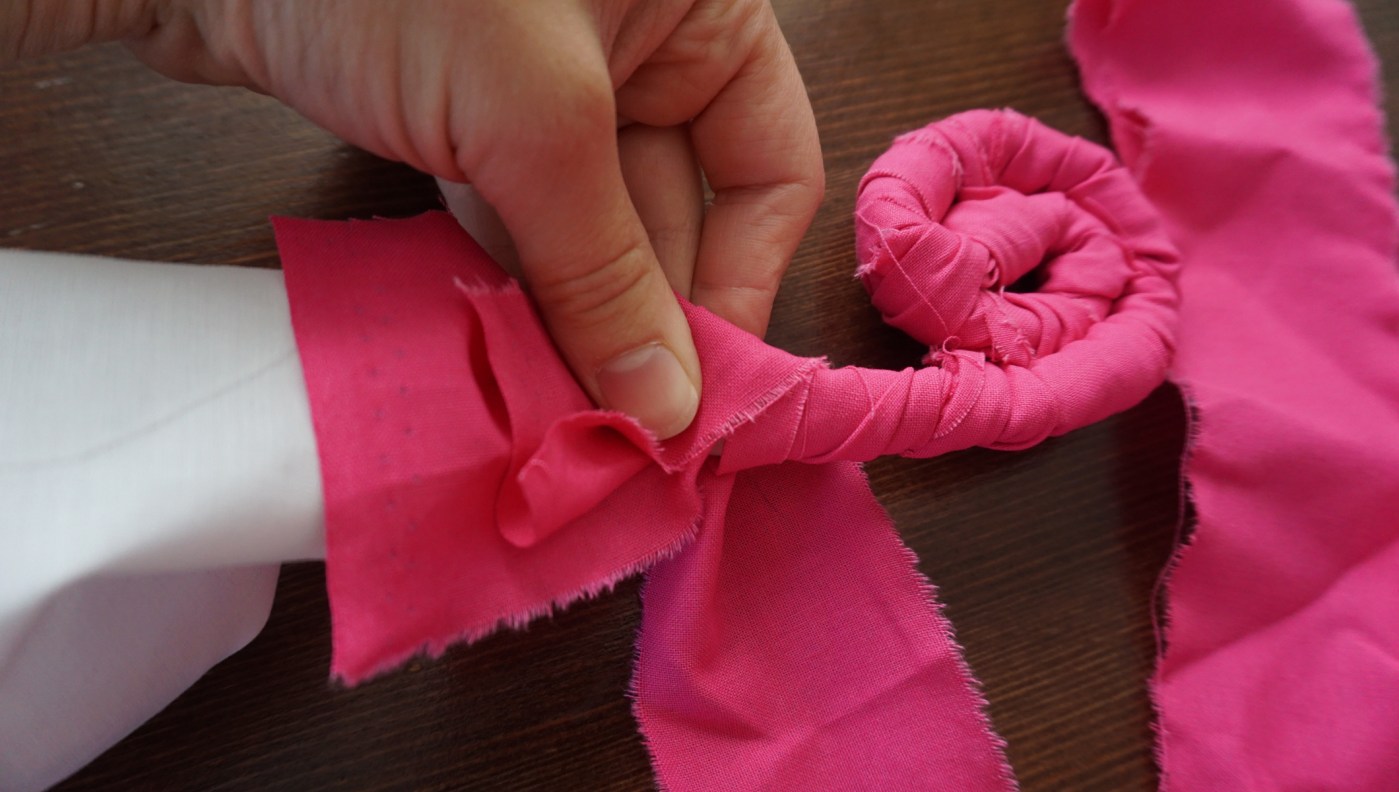
1. Bunch your center fabric together tightly at an end. Place an end of your first strip of coiling fabric right side out and at a right angle to your center fabric approximately 10cms (4″) from the bunched end and wrap around center fabric. Tightly wrap the coiling fabric around it’s own loose end and continue to wrap on an angle down your center fabric. Now you’re coiling!

2. Once you have approximately 15cms (6″) done, turn this coiled end toward itself and begin to coil around loose end of center fabric. After coiling 8cms (3″) coil one single time in the opposite direction you are wrapping through the hole you’ve created then continue to coil center fabric as you were doing previously. This is your first basket weave.

3. Continue to coil and weave through centre oval once every 8cms (3″) until it becomes a flat spiral shape. At this point you will be approaching the end of your first strip of coil fabric. To add another, simply lay the last bit of previous coiling fabric flat against center fabric and lay new coiling fabric flat in same position as previous. Coil around both pulling tightly to be sure they don’t come loose. Apply a similar technique when adding another center fabric strip: overlap the ends and coil extra tight.

4. Continue to follow this pattern of coiling and weaving until you’ve reached the desired circumference for the bottom of your basket. At any point you can now begin to hold your center fabric at a 45 degree angle as you weave to begin to build your sides. Continue on this angle until you’ve reached another point you’d like to change the shape again.

5. Coil and weave away! Continue on using strips and colour combinations in any pattern or order you like. Don’t worry about frayed ends, they add to the boho chic style of your finished product!
6. To finish your basket, cut end of last coiling fabric strip into two pieces and tie a double knot around last row of coil ensuring your center fabric in fully covered by the last wrap you’ve done. Now it’s ready to use!

Christmas is over, but more holidays are fast approaching. Get into the crafting spirit with these cute & festive prints for Valentine’s Day, St Patrick’s Day and Easter!


Item 0710200 Holiday Prints | 65% polyester/35% cotton | 112cm
Add a bright spring touch to your home decor with these cheery Easter wreaths!

Download printable PDF here.

Item# 0644305000D


