Posts in Tag

DIY

Create your own fun and “Dazzling” Fruit Scrubbies in a few simple steps.

This project is perfect for keeping summer alive all year round and brings just the right pop of colour to your kitchen clean ups!

Materials:
– 2-4 balls of dishcloth or textured yarn* in colours: White, Yellow, Green, Red and/or Black
– 5.5mm (I-9) crochet hook
– 6 stitch markers
– scissors
*Gauge is not important for this project

Abbreviations:
ch = chain
dc = double crochet
st(s) = stitch(es)
sl st = slip stitch

Citrus Lemon & Lime Instructions

Round 1: With colour ‘White’, ch 4. Sl st in 1st ch, creating a loop. Work 8dc into the centre of the loop. Sl st in the 1st dc to close round.

* Switch to colour ‘Yellow’ (or ‘Green’ for Lime)
Round 2: Ch3 (counts as 1st dc), 1dc into same st, 2dc into each st in round. Sl st to top of ch3 to close round.

Round 3: Repeat Round 2.

Round 4: Ch3 (counts as 1st dc), 1dc into each st in round. Sl st to top of ch3 to close round.

* Switch to colour ‘White’
Round 5: Repeat Round 2.

* Switch to colour ’Yellow’ (or ‘Green’ for Lime)
Round 6: Repeat Round 4.

Finishing: Place 6 stitch markers equally around the edge of Round 5. With colour ‘White’, from the center, use surface slip sts between each round until you hit a marker. Repeat 5 times. Weave in all ends.

Watermelon Fun Instructions

Same pattern as ‘Citrus Lemon & Lime’.

Round 1-4: Use colour ‘Red’

Round 5: Use colour ‘White’

Round 6: Use colour ‘Green’

Finishing: With colour ‘Black’, sl st knots to create the seeds. Weave in all ends.

Download your own printable instructions PDF here.

Featured yarn used in this project is “Dishcloth Dazzle Yarn“.

Making this origami crossbody bag is easy and fun and oh-so-rewarding. Mix bag and lining fabrics to match all your outfits and add your own strap styles and embellishments to create extra personal touches.

It’s easy to adjust the size to make smaller as an evening bag or bigger for shopping … just be sure the rectangle size is length is 3 times longer than the width.

What You Need:
.3m of 150cm boiled wool fabric (or similar weight)
.3m of lining fabric (any width)
1.2m faux leather or other trim for the strap
2x triangle rings
2x swivel hooks

STEP 1:
Cut 1 piece each of the wool and the lining 36×12”. With right sides together, sew around all edges leaving a small opening.

STEP 2:
Turn right side out, press flat and edge stitch around the entire rectangle. Mark 14” on top and bottom edge as diagram and fold as shown.

STEP 3:
Fold sides towards the center along top and bottom points and pin. Machine stitch in place as far as possible along edgestitch end as shown. Hand stitch remaining opening to the point.

STEP 4:
Flip over and repeat. It will be trickier to sew the flap to the body on the 2nd side. Sew as far as you can and hand stitch remaining opening closed.

STEP 5:
Fold top of the bag tips over triangle ring bar and stitch in place as shown. Cut the strap to your preferred length, fold ends over swivel hooks as shown and stitch.

STEP 6:
Attach handle and add embellishments such as tassels or appliqués to personalize.

With the swivel hooks, it’s easy to make multiple straps to suit your mood or for an extra-easy version, just sew the strap trim directly to the corners of the bag.

Download your own instructions PDF here.

Looking for something to help decorate your home for autumn? Want to be creative and get the kids involved? This Felt Harvest Wreath is the perfect no-sew project!

SUPPLIES
• Wreath Ring
• Felt
• Fabric Of Your Choice
• Trim or Ribbon
• Scissors
• Fabric Glue

Step 1:
Cut out your leaves using the template provided or create your own!

Step 2:
For leaf shape #4 (see template), put a dab of glue on one end and pinch together until secure. This will give the leaf a more 3D effect.

Step 3:
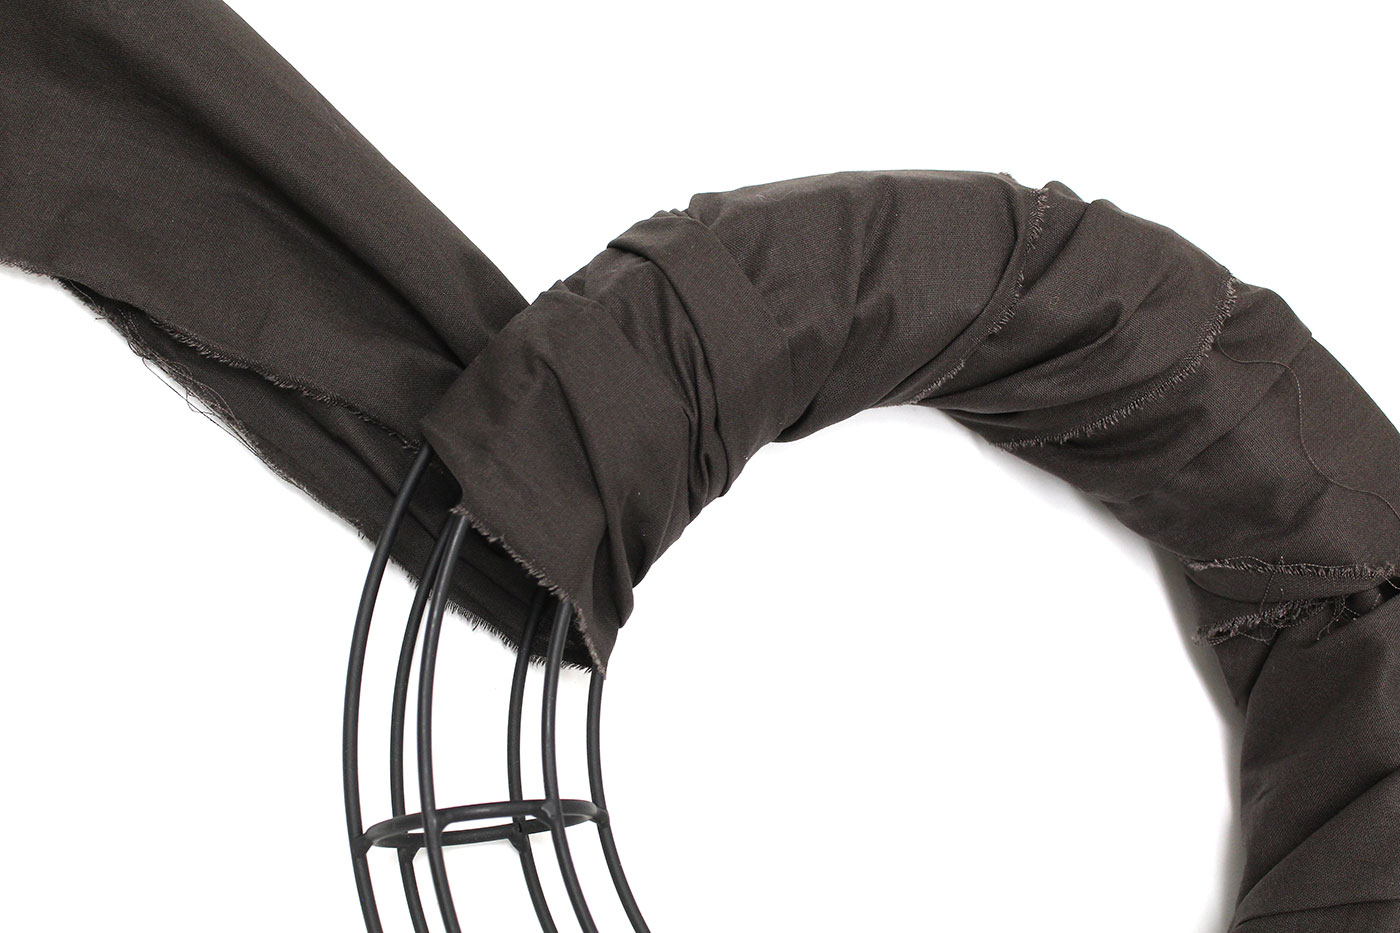
Cut strips of fabric and wrap around your wreath frame. Secure with glue.

Step 4:
Wrap decorative ribbon or trim over the fabric. Secure with glue.

Step 5:
Layer leaves on top of the fabric and glue in place.

TIP: Use pins to map out placement of leaves before securing with glue.

Download project instructions and leaves template here.

If you’re a crocheter AND plant lover, this project is just for you! Create these cute plant holders for your mini succulent pots or other small plants. Hang them anywhere around your home or office and add some life into your living space!

Materials:

Super Bulky 6 or Jumbo 7 weight yarn
12mm crochet hook
1 stitch marker
measuring tape
scissors

Gauge:

6 sc x 7 rows = 4” (10 cm)
* This is only a recommended gauge used to fit a mini 3″ x 2.5″ (7.5cm x 6.5cm) clay pot, using a 12mm crochet hook, as suggested. It is to be used as a reference. You may use the recommended hook size found on the label. Just note, gauge and size of project will vary depending on the yarn and hook size chosen.

Abbreviations:

CH = chain
SC = single crochet
SL ST = slip stitch
ST(S) = stitch(es)

Round 1:

CH3, then close circle with a SL ST in the first CH. Make 1 SC in the middle of the circle, and then place a stitch marker on that ST. Make 5 more SC in the middle of the circle (Total of 6 STS)

Round 2:

Make 2 SC in the first ST. Place stitch marker on the first SC. Continue to make 2 SC in each ST. (Total of 12 STS)

Round 3:

*Make 1 SC in the first ST. Place stitch marker. Make 2 SC in the next; While keeping the stitch marker on the first ST, repeat from * to end of round. (Total of 18 STS)

Round 4:

*Make 1 SC in the first 2 STS. Place stitch marker on the first SC. Make 2 SC in the third ST; While keeping the stitch marker on the first ST, repeat from * to end of round. (Total of 24 STS)

Round 5-9:

Make 1 SC in each ST to end of round. Continue to place your stitch marker on the first SC of the round to keep track of each round. The edges will naturally begin to roll.

Round 10:

CH8, SL ST in the first ST, and continue to SL ST each ST to the end of round, including the CH. (Total of 32 STS)

Finishing:

Measure 8” (20cm) of your working yarn, cut. Wrap the tail end around the CH a few times. This will create the handle of your plant holder. Thread the tail end through all the wraps to keep it in place. Weave in all ends.

Download Printable PDF here.

Featured yarn used in this project is “Mammoth Yarn”.

From the Pacific to the Atlantic and North to the Arctic Ocean; Canada has so much to see. Celebrate the beauty and diversity of the provinces and territories with the Canada Postcard panel prints.

Canada postcard cotton print with provinces and territories
2nd Canada postcard print with provinces and territories
Item #0649120 | 100% cotton | 112cm

These panel prints are fun to make into a Canadian themed quilt in just the right size to cozy up at the cabin or use as an afternoon picnic blanket.

What you need:

1x each Canada Postcard panel
.8m of 112cm solid cotton for sashing
2.5m of 112cm cotton blender for border
2.5m of 112cm cotton blender for backing
Quilt batting of your choice

Panels, cotton quilting fabrics and materials needed to make the Canada Postcard quilt.

What you do:

1. Cut the squares apart leaving the 1/2” border around each. (total 15 squares needed)
TIP: use the border of each square as the guide for cutting.

Single Canada Postcard square from panel print

2. Cut 20 sashing strips 2.5 x 11.5” and 6 strips 2.5 x 46.25”.

3. Arrange the blocks in the order that you’d like.
Then, working left to right, sew on the vertical 11.5” sashing strips = sashing + square1 + sashing + square2 + sashing + square 3 + sashing.
Continue with other 4 rows.
TIP: If you turn the square to the wrong side you can use the border as your seam allowance.

Panel square example with added sashing

4. Sew the horizontal 46.25” sashing pieces to the top and bottom of the 1st row, in between all rows and along the bottom.

Complete panels squares with added sashing for quilt

5. Cut 2 vertical border pieces 6 x 60” and attach along side edges.

6. Next cut 2 horizontal border pieces 6 x 46” and attach along the top and bottom edges to complete your quilt top.

Panel squares with added borders for final quilt top.

7. Measure backing as fabric width x 72” length and layer backing (face down), quilt batting and quilt top (face up). Pin securely and trim. Baste close to edge.

8. To finish, quilt as desired and bind edges.

Close-up photo of quilting stitch and binding
Quilt front
Quilt back

Download instructions here.

Finished Canada Postcard quilt.

With the leftover square, why not craft an easy-sew bag to store and carry your Canada Postcard quilt for your next adventure?

Carrying bag for Canada Postcard quilt

If you’re wanting a more rustic look there’s a second colour choice in both panel designs with grass greens, deeper blues and burgundy colours.

Jazz up your pup’s accessories with this adorable, functional and fun project. With so many trims to choose from you can create styles for every doggy personality … confident and classic, outgoing and sparkly or just laid back and casual; there’s a trim or embellishment for every look!

DIY dog collar examples

What you need:

  • ruler / measuring tape
  • fabric glue / needle & thread
  • scissors
  • webbing (1/2-1″ thickness)
  • D ring
  • parachute clip
  • slider
  • decorative trim
DIY dog collar supplies

What you do:

DIY dog collar instructions

Download instructions here

And why stop here … another great project for your furry friend is this super simple no-sew dog bed.

DIY dog bed and a cute dog named Sushi

Click here to learn how

No-sew fabric baskets are fun to make, are great for organizing all the little things around your home … and would be a pretty Easter basket too!

Choose fabrics to match your home, the holiday or to create a splash of pretty colour.

What you’ll need:
1.8 m non stretch cotton cut or ripped into 15cm (6″) strips for your center fabric
1.2m craft cottons of your choosing cut or ripped into 4cm (1.5″) strips for your coiling fabric

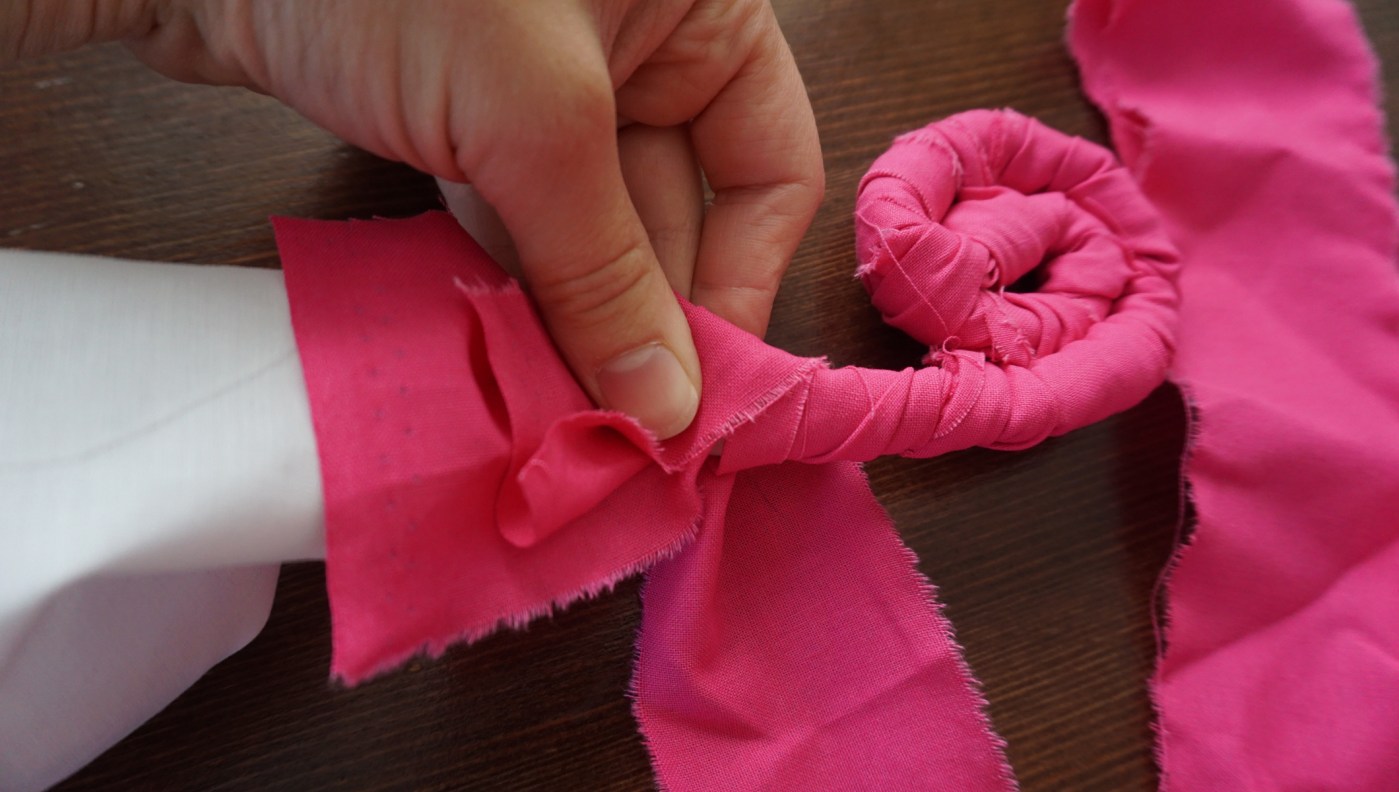
1. Bunch your center fabric together tightly at an end. Place an end of your first strip of coiling fabric right side out and at a right angle to your center fabric approximately 10cms (4″) from the bunched end and wrap around center fabric. Tightly wrap the coiling fabric around it’s own loose end and continue to wrap on an angle down your center fabric. Now you’re coiling!

2. Once you have approximately 15cms (6″) done, turn this coiled end toward itself and begin to coil around loose end of center fabric. After coiling 8cms (3″) coil one single time in the opposite direction you are wrapping through the hole you’ve created then continue to coil center fabric as you were doing previously. This is your first basket weave.

3. Continue to coil and weave through centre oval once every 8cms (3″) until it becomes a flat spiral shape. At this point you will be approaching the end of your first strip of coil fabric. To add another, simply lay the last bit of previous coiling fabric flat against center fabric and lay new coiling fabric flat in same position as previous. Coil around both pulling tightly to be sure they don’t come loose. Apply a similar technique when adding another center fabric strip: overlap the ends and coil extra tight.

4. Continue to follow this pattern of coiling and weaving until you’ve reached the desired circumference for the bottom of your basket. At any point you can now begin to hold your center fabric at a 45 degree angle as you weave to begin to build your sides. Continue on this angle until you’ve reached another point you’d like to change the shape again.

5. Coil and weave away! Continue on using strips and colour combinations in any pattern or order you like. Don’t worry about frayed ends, they add to the boho chic style of your finished product!

6. To finish your basket, cut end of last coiling fabric strip into two pieces and tie a double knot around last row of coil ensuring your center fabric in fully covered by the last wrap you’ve done. Now it’s ready to use!

Download instructions here

Flannelette is such a versatile fabric; from PJ pants and dog jackets to sleep sacks and floor pillows…the possibilities are endless!

Check out some of the new flannelette prints and get inspired.


Item# 0374300 | 100% cotton | 110cm wide

With all these cute & fun prints why not try creating something!

This Bib & Blanket DIY makes the perfect gift for the newest little one. Get the instructions and pattern here.

Need a quick gift? Or just want something new and fun to keep you warm? Make a back-to-back throw in under an hour using cozy, fuzzy chenille.

It’s super simple with a lot of pins!  You need 1.3m of both the chenille fur for the face and the micro chenille for the back.  Trim selvedges and straighten both edges of the micro chenille to have a 1.25×1.5cm (50×60″) rectangle.  Lay the micro chenille over top of the fur chenille with right sides together and pin every 7cm (3″). Trim the chenille fur to match the micro chenille.  Stitch 1.25cm (.5″) around the entire throw leaving a 15cm (6″) opening.  Remove pins, turn right side out and hand or machine stitch the opening closed.  That’s it!

Fabric suggestions:

Item 0271800 Waves Chenille Fur | 100% polyester | 150cm

Item 0271770 Rainbow Stripe Chenille Fur | 100% polyester | 150cm

Item 0242204 | Rainbow Stripe Micro Chenille | 100% polyester | 150cm

Creating your own jewelry set for this year’s holiday or New Year’s party will not only make it special, but will allow you to co-ordinate with your outfit!

With the wide selection of chain, findings, beads and accessories available at your local Fabricland, you can create the exact jewelry piece you want.

Download a printable copy of the instructions here.

Check out this informative Beading Basics post filled with tips, tricks and knowledge!

1 2 3 4 5 6 10 Page 4 of 10