Posts in Category

DIY

No-sew fabric baskets are fun to make, are great for organizing all the little things around your home … and would be a pretty Easter basket too!

Choose fabrics to match your home, the holiday or to create a splash of pretty colour.

What you’ll need:
1.8 m non stretch cotton cut or ripped into 15cm (6″) strips for your center fabric
1.2m craft cottons of your choosing cut or ripped into 4cm (1.5″) strips for your coiling fabric

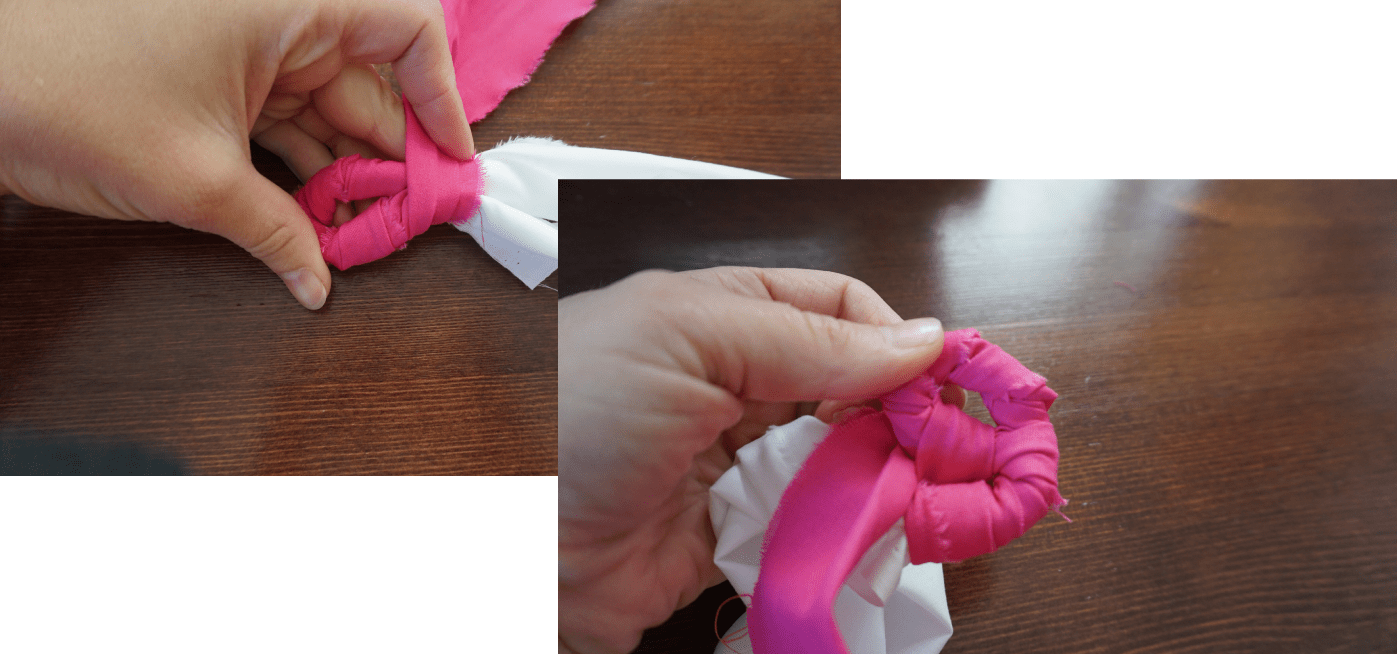
1. Bunch your center fabric together tightly at an end. Place an end of your first strip of coiling fabric right side out and at a right angle to your center fabric approximately 10cms (4″) from the bunched end and wrap around center fabric. Tightly wrap the coiling fabric around it’s own loose end and continue to wrap on an angle down your center fabric. Now you’re coiling!

2. Once you have approximately 15cms (6″) done, turn this coiled end toward itself and begin to coil around loose end of center fabric. After coiling 8cms (3″) coil one single time in the opposite direction you are wrapping through the hole you’ve created then continue to coil center fabric as you were doing previously. This is your first basket weave.

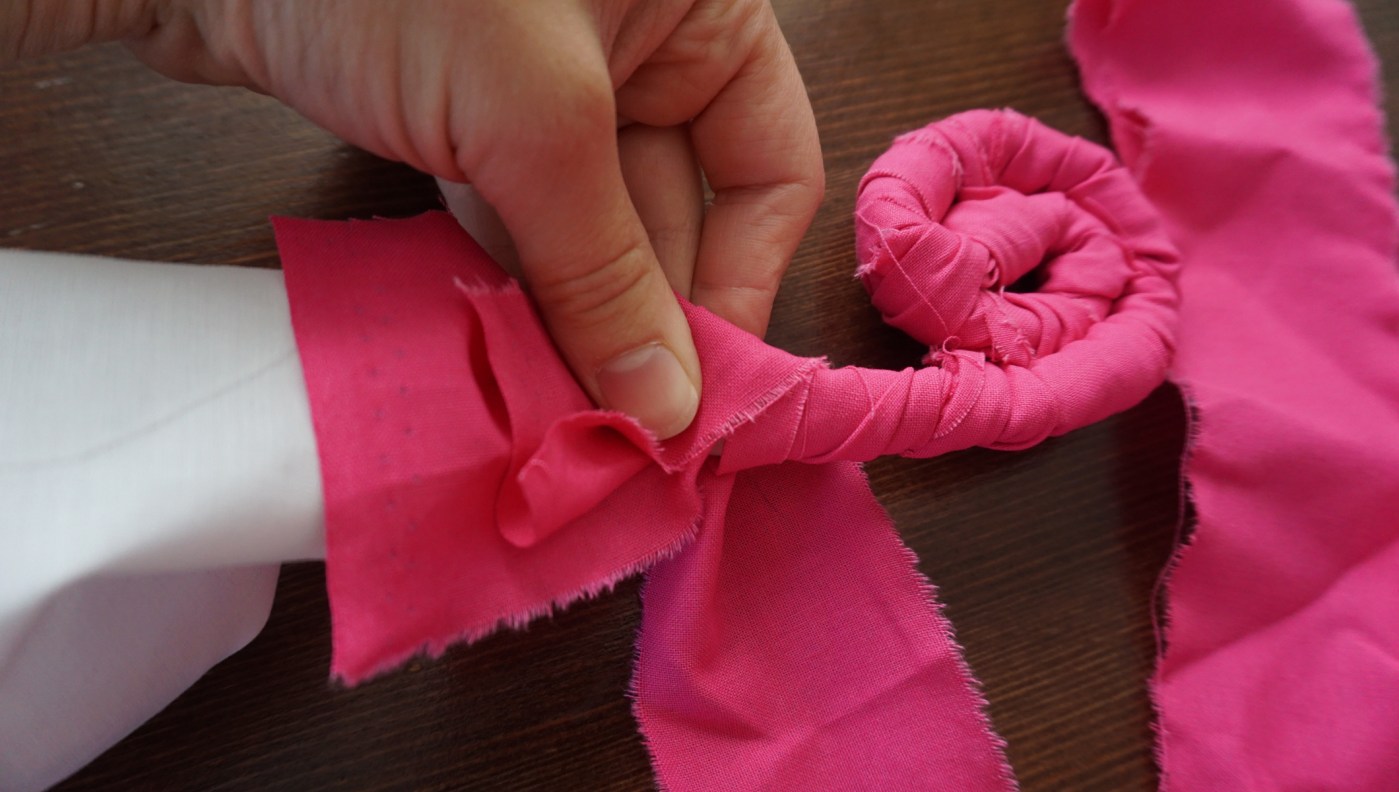
3. Continue to coil and weave through centre oval once every 8cms (3″) until it becomes a flat spiral shape. At this point you will be approaching the end of your first strip of coil fabric. To add another, simply lay the last bit of previous coiling fabric flat against center fabric and lay new coiling fabric flat in same position as previous. Coil around both pulling tightly to be sure they don’t come loose. Apply a similar technique when adding another center fabric strip: overlap the ends and coil extra tight.

4. Continue to follow this pattern of coiling and weaving until you’ve reached the desired circumference for the bottom of your basket. At any point you can now begin to hold your center fabric at a 45 degree angle as you weave to begin to build your sides. Continue on this angle until you’ve reached another point you’d like to change the shape again.

5. Coil and weave away! Continue on using strips and colour combinations in any pattern or order you like. Don’t worry about frayed ends, they add to the boho chic style of your finished product!

6. To finish your basket, cut end of last coiling fabric strip into two pieces and tie a double knot around last row of coil ensuring your center fabric in fully covered by the last wrap you’ve done. Now it’s ready to use!

Download instructions here

Need a quick gift? Or just want something new and fun to keep you warm? Make a back-to-back throw in under an hour using cozy, fuzzy chenille.

It’s super simple with a lot of pins!  You need 1.3m of both the chenille fur for the face and the micro chenille for the back.  Trim selvedges and straighten both edges of the micro chenille to have a 1.25×1.5cm (50×60″) rectangle.  Lay the micro chenille over top of the fur chenille with right sides together and pin every 7cm (3″). Trim the chenille fur to match the micro chenille.  Stitch 1.25cm (.5″) around the entire throw leaving a 15cm (6″) opening.  Remove pins, turn right side out and hand or machine stitch the opening closed.  That’s it!

Fabric suggestions:

Item 0271800 Waves Chenille Fur | 100% polyester | 150cm

Item 0271770 Rainbow Stripe Chenille Fur | 100% polyester | 150cm

Item 0242204 | Rainbow Stripe Micro Chenille | 100% polyester | 150cm

Check out these cute sweethearts! A rice-filled bear, cat and bunny – perfectly sized for your little one’s boo-boos.


From ear aches to growing pains; these special microwaveable stuffies will help comfort away the unpleasant feelings and turn frowns into smiles. Alternatively, these rice-filled animals can be placed in the freezer to create cold packs for bumped knees, tooth aches or other minor ouchies.

Download instructions here. | Download patterns here.

Fabric featured in this DIY is from the Bloomfield collection. See the full fabric group here.

Easy to sew grommet cushions make a stylish statement when updating your home decor.  Use a neutral fabric and change the ribbon often to update in a flash or match your decor with new fabrics and elegant ribbons. 

The new Around the World decor group with be sure to have the new look you’re searching for … see the complete group here.

Grommet cushion instructions

Download instructions here

Creating your own jewelry set for this year’s holiday or New Year’s party will not only make it special, but will allow you to co-ordinate with your outfit!

With the wide selection of chain, findings, beads and accessories available at your local Fabricland, you can create the exact jewelry piece you want.

Download a printable copy of the instructions here.

Check out this informative Beading Basics post filled with tips, tricks and knowledge!

Quick Coating

Keep warm with these easy and almost no-sew project ideas.  Chilly days are no match for cozy vests and capes. 

Download instructions

Download instructions

Coatings of many different weights, types and styles are available for your next project.  Choose from plaids, textured boucles or solids in a wide range of colour and so much more.

Item 34435888000R Classic Plaid Coating | 98% polyester 2% other fibre | 150cm

Item 3421389000R Seasonal Boucle Jacketing | 65% polyester 35% rayon | 148cm

Item 3412889000R Seasonal Boucle Jacketing | 59% polyester 41% acrylic | 150cm

Item 3423888000R  Seasonal Coating | 80% polyester 20% wool | 147cm

‘Tis the time of year to start thinking about festive decor. The table tends to be the heart of the home whether for a family dinner or a holiday party. Pick your favourite craft prints and dress it up with a made-by-you Quilted Table Runner.

Download printable instructions here.

Here’s a simple, yet fun project for some quick DIY decorations using felt and few notions!

Once you’ve got all your items together, cut out the pattern shapes.

Next, pin the shapes to the appropriately coloured felt.

Once pinned, cut out all the pieces.


Once cut, arrange all the pieces in preparation for gluing.

Glue down all the pieces of felt using a glue gun, or similar adhesive.

Decorate with sequin trim, google eyes or use your creativity to embelish your spooky shapes your own way!


Don’t they look spooktacular?! Decorate windows, walls and doorways using thread to hang or use them to add fun to your party’s snack table!

Download the pattern shapes here: Pumpkin | Ghost | Spider.

Let imaginations run wild with these cute felt Deer, Fox and Raccoon mask patterns.

Gather the materials you will need for this project.

Step 1:

Cut out all the shapes from the pattern. Pin your paper outlines to the appropriate colour felt and cut around.

Step 2:

Layer and glue the pieces of felt on top of one another. Using the picture reference as a guide.

Step 3:

To tie the mask, you will need to measure out approximately two 15” pieces of ribbon. Glue each piece (on the back side) near the edge of the mask, around where the middle of the eye cut outs are. Once all your glue has dried, try your new felt mask on! If the ribbon is too long after tying a bow, cut off any excess.
 

Download the printable PDF of patterns here.
Download the printable PDF of instructions here.

Featured fabric for this project is from the Happy Camper group. Check out all the sweetness here.

As an alternate option, use a fluffy & plush material such Berber Chenille for a cozy quilt perfect for cuddling down. Quilt Basting Spray is a helpful product to hold quilt layers together prior to final stitches. Check out this informational video for this great product.

Download printable PDF of project instructions here.

Share your DIY photos with #Fabricland50 … and show everyone your creativity!

1 4 5 6 7 8 11 Page 6 of 11